REVITY and Animation
REVITY is all about taking clients to the next level in their marketing. One of our most profitable tools to help our clients achieve their success is animation. Our animation department has years of experience in the field. We work to represent clients through fun, witty, interactive, and interesting animations that convey a message. With animation, you’re doing more than showcasing your product or services—you’re telling a story. With high-quality animation, you can convert viewers into customers and grow your revenue—and at REVITY we are all about increasing revenue.
At REVITY, we offer 2D animation, 3D animation, whiteboard animation, animated logo services, animated pilots, and more. No matter the project we’re working on, it all starts with storyboarding. SO, what do you know about storyboarding? Today, we’re sharing some tips on how to make the process a little easier and how to come out with a better-finished product.
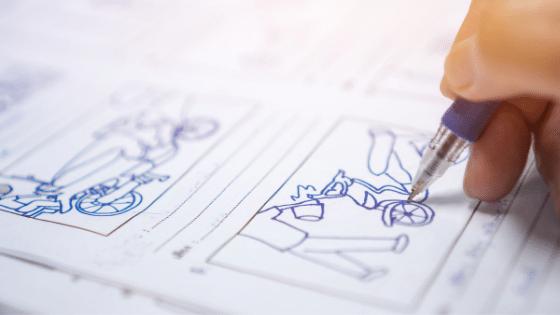
What is Storyboarding?
Simply put, a storyboard is a comic strip-like visual that represents a narrative of your project. Storyboarding a creative way to set the stage for your story—it’s a great way to lay a foundation. Storyboards are an ideal place to start the animation process—whether you’re animating an entire film, a quick commercial, or even just an advertisement with just a few frames. Creating a storyboard is like creating a visual representation of your thoughts. You can easily share your vision for the project with clients and others involved in the project.
1. Tell a story.
Storyboarding is a representation of a narrative. The first step of the process will be reading the script provided. Next, you’ll want to determine how you’re going to answer the who, what, where questions. What are you trying to convey with this storyboard?
2. Keep it simple.
A storyboard is a simple preproduction process. There is no need to overdo your storyboard. A storyboard’s objective is to convey a message. This is not the time to show off your technical skills, keep it simple. A storyboard should help to organize your team working on the project and organize your thoughts before you really dive deep. It should be simple.
3. Stay organized.
Use a grid system to display the storyboard with about 6 to 9 panels per page. You should also be sure to consider aspect ratio. Each panel that you draw should represent an individual scene. Number everything! Number pages, number panels, number subpanels, number everything you can.
4. One frame shows one idea.
An animation moves quickly—it can be difficult for the audience to keep up. Don’t try to squeeze too much into one frame. Just focus on one idea and move onto the next one. Draw your frame clearly. It’s okay if it’s just loose thumbnails, no need to be completely clean.
5. Communicate through character poses.
Poses should be simple and clearly convey the story. It’s important to get the right number of poses. Too many will lose its meaning, whereas too few will cause the character to be sluggish and lost in the animation. Poses should change as attitude changes in the character. These movements can show the character thinking and reacting without a dialogue. Think like an actor. Picture someone acting out the scene. If there is voice dialogue, listen to it and envision someone acting it out.
6. Camera angles say a lot.
As you are drawing your thumbnails, remember the horizon line. The camera placement can determine this line. Remember to consider a variety of camera angles. Low horizon lines are much more common because they are really how most of us see the world, looking down. They also show depth, have fewer perspective challenges and make for clearer staging. use horizon lines can also give you the chance to establish or re-establish different character heights. C
7. Use a grid.
A grid will help you have a sense of space and camera angles. It also helps you to be congruent from frame to frame. Use the foreground, mid-ground, background, and far background to help you create some depth. With a grid, you’ll be able to better create different distances and depths.
8. Be careful with your frame.
Don’t squeeze character into a frame just to fit them in a shot. If you want to show multiple characters, they don’t all need to be facing the camera. Consider trying an over the should shot. This can be one way to show intimacy or other emotions without dialogue. Remember to have empty space. Having too many elements on each frame will get busy and lead to an animation that is just too much to look at. Keep your frame clean, your characters responsibly sized, and use your negative space wisely.
9. Be motivated for every cut.
Storyboards should show the motivation for cuts. The motivation can be heads turning, movements, written in sound effects, camera angle change, and so on. If nothing changes from frame to frame, there is no need for a new frame. Consider film time and editing as you work out what will go in each frame. Scenes and shots should move through a sequence.
10. Consider the animation layout.
The animation layout is made up of the mechanics of how an animation camera works. Animation provides an illusion of dimension and movement. It may be helpful to include direction signals for motion. Whether you make small notes under each panel or use arrows to signal camera movement, the layout should be clear.
If you’re looking to take your company’s marketing up a notch with some next-level animation, contact the experts at REVITY. We’ll work with you to plan out an animation that will best represent your company and convey your desired message.
Animation helps you to tell a story. Marketing these days is about so much more than just presenting a product. Tell your story with our animators and professional storytellers! Animation can convert viewers into customers as you engage them with the story about your product and services.